Adobe InDesign
Incorporate accessibility early in InDesign
To make PDFs from InDesign more accessible, most of the work should be done in InDesign. This strategy cuts down on the remediation work needed in Acrobat Pro. If you have to edit something in InDesign, you won’t have to repeat all the remediation steps in Acrobat.
Accessibility basics include fundamental considerations, such as font legibility, good color contrast, meaningful link text, proper link formatting, the use of real lists instead of fake ones, and more.
Here, we provide specific strategies to make PDFs created in InDesign more accessible.
Steps in InDesign
Use Paragraph Styles
The benefit of using Paragraph Styles is not only accessibility but also consistency of formatting and efficiency. When you change the formatting of a style, all text to which the style has been applied will be updated with the new format.
You will be associating Paragraph Styles you use for your headings and other elements with proper PDF tags next.
Use headings to organize your document effectively
Headings play an important role in accessibility because they convey the structure of content. They benefit those who visually scan the headings and those who rely on screen readers to voice out existing headings.
Consider using a naming convention for paragraph styles that indicates the heading level.
H1 will usually be the title of your document. Follow the heading hierarchy (H1, H2, H3, H4…) without skipping levels. For example, don’t jump from H1 to H3. Text that doesn’t serve as a heading should not be marked as one.
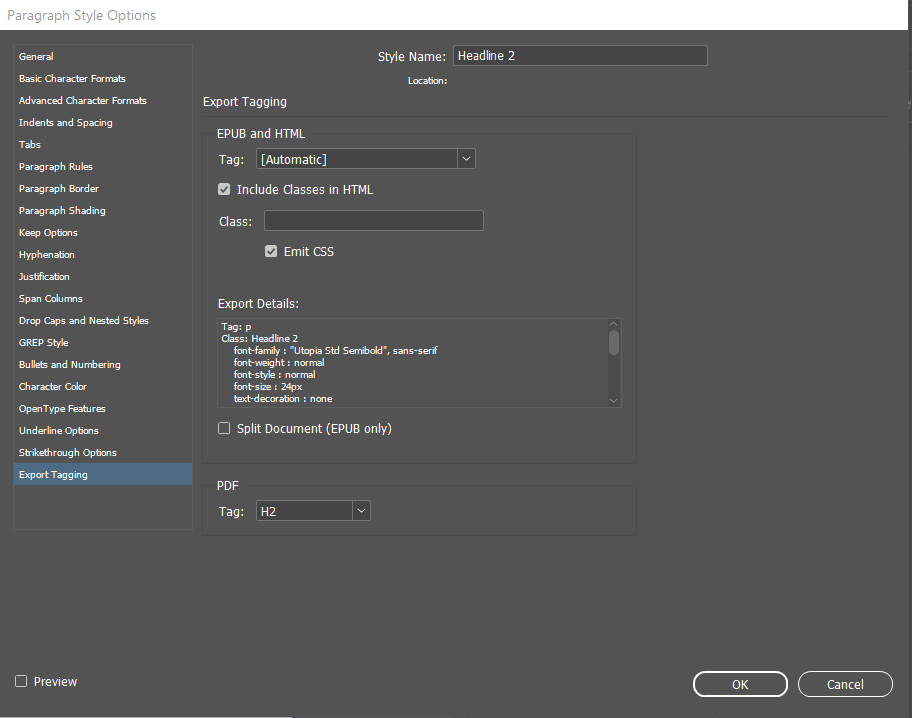
Map Paragraph Styles to PDF tags
Use Export Tagging to define how InDesign Paragraph Styles are tagged in PDF.
- Select a paragraph style
- Go to More Options
- Go to Style Options
- Select Export Tagging in a new window
- Under PDF, change default Tag: [Automatic] to correct tag (P, H1, H2… H6, Artifact)
- Click OK
You can also modify all the export tags in a single window:
- Go to More Options
- Edit All Export Tags
- Toggle Show to PDF
- Map each Style to a Tag
- Click OK
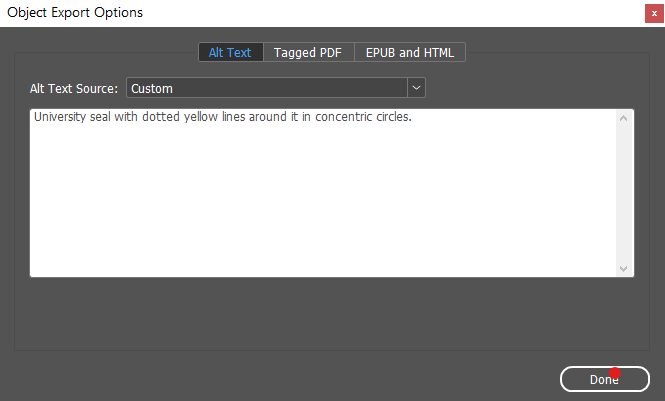
Add alternative text for images
If you add an image to your content, you must add alternative text to describe it because screen readers can’t read pictures.
- Select the image with the Selection tool
- Choose Object
- Select Object Export Options
- Select the Alt Text tab in the Object Export Options dialog
- Select Custom from the Alt Text Source menu
- Enter the description in the text field
- Click Done
Anchor images within the content
Select and hold the mouse on the anchor icon or the blue square at the top right of the image, then drag it to where you want the image in the document to be read. Release the mouse button. This will ensure appropriate reading order.
Use threaded text frames
For the correct flow of text use threaded text frames for continuous text, rather than disconnected text frames.
Designate header row in tables
- Go to Table
- Create Table
- Type the number of header rows
Avoid complex tables. Note that tables with multiple column headers or row headers require additional remediation in Acrobat Pro.
Establish content order in the Articles panel
The Articles panel lets you decide the order of content tags. This determines the order in which assistive technology will read content.
Drag and drop frames and objects into the panel to set the reading order. You can organize content into smaller articles too, without changing the page layout.
- Go to Window
- Select Articles
- Select the page objects: Press and hold the shift key, then click each object in the order you want them to appear, or select all at once and arrange them later in the Articles Panel.
- To add content to the Articles Panel, drag the selected objects into it and name the Article. A list of objects will then show up in the panel.
- Repeat for each page!
Specify document title
To add a title:
- Go to File
- Select File Info
- Type in a Document Title
Consider adding more metadata to make the document easier to find.
Incorporate various navigation mechanisms
Add to your file contents tables, bookmarks, hyperlinks, and cross-references to help users navigate to specific content. This makes it easier for a screen reader user to move through the document.
Export as PDF with settings optimized for accessibility
If the primary purpose is the web:
- Go to File
- Go to Export
- Select Format: Adobe PDF (Interactive)
- Save
- Check Create Tagged PDF and Use Structure for Tab Order
- Select OK
If the document is for print and web:
- Go to File
- Go to Export
- Go to Format: Adobe PDF (Print)
- Save
- Set compatibility to Acrobat 6 (PDF 1.5) or higher.
- Select Create tagged PDF, Bookmarks, and Hyperlinks,
- Select OK
Steps in Acrobat Pro
- Set the language in Document Properties
- Change display name from Filename to Document Title
- Set the tab order to use the document structure in the Page Thumbnails pane
- Run the Acrobat accessibility check
- Run the PAC accessibility check
Tools
- Color contrast checkers
- Acrobat plugin: PDFGoHTML (shows where the tagging of the PDF needs improvement)
- InDesign plugin: MadeToTag
- PDF testing: PAC (more accurate than Acrobat Accessibility Check)
- Screen readers: NVDA, JAWS
- PDF remediation solution: Equidox
- Other testing tools
External resources
- Adobe Creating Accessible PDFs
- Tagged PDF – PDF help resources
- Creative Boost – courses, accessibility resources, podcast
- Chax Accessibility Training – courses, accessibility resources, podcast
- PDF Accessibility YouTube channel
- PDF Accessibility Facebook group